Small tutorial on how to set up a video wall
Hardware requirements
- Screens + HDMI cables
- One Pi per Screen
- Ethernet connection to each Pi (you can also use WiFi, but I would suggest you use Ethernet first as it usually “just works”. You can switch to WiFi later)
Steps
-
Sign up to info-beamer. It’s free and done in a minute.
-
Set up the Pis by following the installation instructions. Installation is really simple (just unzip the info-beamer OS
install.zipfile to an empty SD) and will only take around 2-3 minutes per Pi. -
Connect all Pis to their screens using an HDMI cable.
-
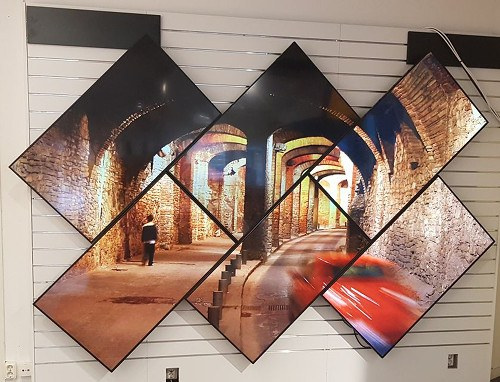
If you want a video wall like in the picture above, import the Magic Video Wall package into your account.
-
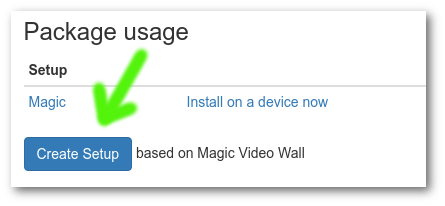
Create a new setup based on this package by clicking on the “Create Setup” button and give your new setup a name. A setup is essentially a configured package that can then be install on any number of devices. In our case we configure the setup to show a video wall on a set number of screens. If you have multiple video walls with different layouts or playlists, you can create a new setup for each of them. Therre’s no need to import the Magic Video Wall package again: You can use the same package multiple times.
-
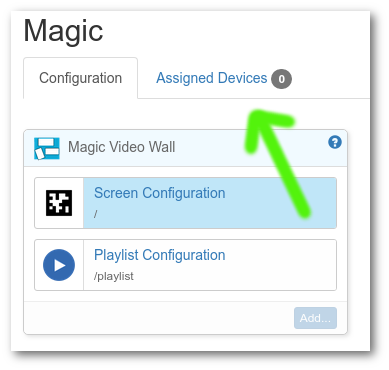
In the resulting setup first click on the Assigned Device Tab. Then install this yet unconfigured Setup to the devices you’ve previously installed. Each will download all files required and show an empty screen.
-
Next, go back to the Configuration tab. It will show the assigned devices as Not mapped. Now click on Save. The Setup now knows which devices you’ve assigned and each should switch to a screen showing something like a QR code (they are actually April Tags)

-
You have two options now: You can either Capture a photo of all your screens and upload that to the configuration page. Or you can use a webcam to capture a picture using the configuration website itself. Another alternative is to capture a picture on your phone and use that.
- If you have an Android Phone, use a browser to log into your info-beamer account and navigate to your Magic Video Wall setup. Then click on the Upload/Create Mapping Picture and select Camera. This allows you to take a picture directly.
- On IOS you can also directly capture pictures. Also select Upload/Create Mapping Picture.
- If you have a webcam attached to your PC you can use that and capture a picture of your video wall that way. Click on Webcam capture, confirm the security dialog and click the preview area or the Capture button again to take a picture.
-
Regardless of how to you create a snapshot of your video wall installation, be sure that all tags are visible and that the area captured in your picture covers all screens. So all screens should be completely visible in your picture.
-
Click on Save. You’re almost done. Now it’s time to set a playlist
-
Click on the Playlist Configuration setting on the left side, then add images and videos to the play list.
-
Click on Save and your devices will all download the assigned images and videos. When ready they will start showing them across all screens.
If you’re not happy with the layout, just repeat the Photo capture steps to create a new mapping. The devices will almost instantly update and you can see the updated result.
Best Practices for running an real installation
-
Enable the Peer-to-Peer feature of info-beamer. It will allow fast downloads of new content (as only a single Pi will download a new video from the internet, while all other Pis will fetch it from directly from that single Pi). Additionally devices will also check each other to see if they all have the correct time. A correct time is critical for a synced video wall, so it’s highly recommended that you enable Peer-to-Peer.
-
Make sure you have a working internet connection. The connection itself doesn’t have to be perfectly reliable (as all videos are cached and played from the local SD card), but the devices must have a correct time, otherwise they will be desyned. If you want, you can also provide a local NTP server. In that case the reliability of your outside internet connection isnt’ that important.