(image generate with stable diffusion)
Yesterday a new feature was added to info-beamer: The ability to schedule setups. Right now this feature isn’t generally available, but if you’re interested, see below. The feature is now available to all users. Click on the Setup scheduling.. button on the setup list page.
The new scheduling feature allows you to automate which setup plays on which device at a certain time. So you can, for example, automatically assign one setup in the morning and another one in the evening. The fact that one device runs one setup at any time remains unchanged, so existing integrations do not have to change anything. The new feature merely automates switching between setups according to a schedule.
Overview
Let’s have a look at the schedule list page:
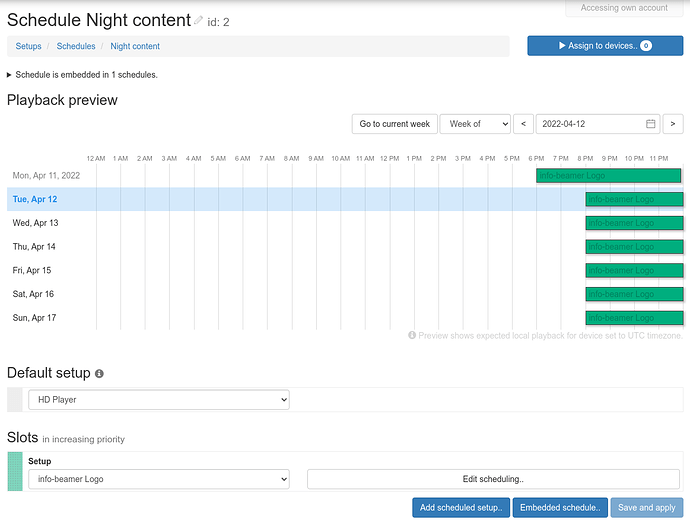
You see all the schedules you’ve created in your account. Clicking on a schedule name jumps to the schedule detail page for that schedule:
There’s a lot here, so let’s walk through:
- The breadcrumb navigation at the top allows you to return to the schedule list. The Assign to device button allows you to assign the schedule to your devices (more on that later) and also shows you how many device currently use the schedule (0 in this case)
- In the playback preview you can see which content will be active within a selectable day, week or month. You can switch between preview range as well as the date you want to preview.
- The Default setup specifies which setup will play on a device by default if no other setup is scheduled. All schedules must have a default setup.
- The Slots allow you to add additional scheduled setups to your schedule. In the example above only the info-beamer Logo setup was added. Using the coloring you see when this setup will be active (as opposed to the default setup) in the playback preview above.
- Slots can also contain other schedules. When embedding another schedule this way, all the scheduled setups within the embedded schedule will be added to the schedule.
Embedding
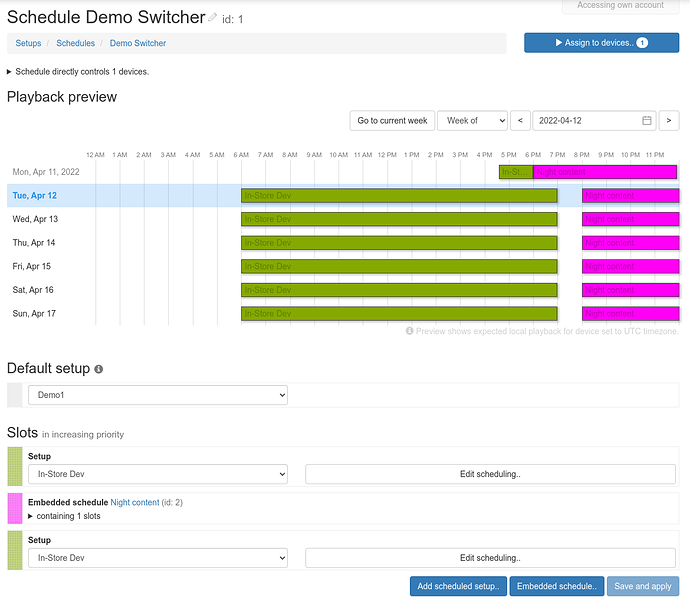
Embedding a schedule within another schedule allows you to reuse schedules and avoids duplicate maintenance when applying changes. You can, for example, have one schedule that is the default of what you want to play across multiple devices. If you then have a single device that should, for example, play a different setup in the morning, you can create a special schedule for that specific device, add the specific schedule and then embed the default schedule. As an example, have a look at the following schedule:
This schedule uses the setup Demo1 as default setup. During the day it will play the In-Store Dev setup. It also embeds the Night content schedule already shown in the preview screenshot. You can see how its slots (shown in pink) are embedded within this schedule. When embedding a schedule, the default setup of the embedded schedule is ignore and only the explicitly scheduled setups are used in the embedding schedule.
Also note that in this example the setup In-Store Dev is scheduled multiple times. This can be useful if you want to apply more than one scheduling rule (more on that later) to a single setup. The slots can be reordered using drag and drop to change their priority.
Nesting of embedded schedules is limited to three levels.
Scheduling
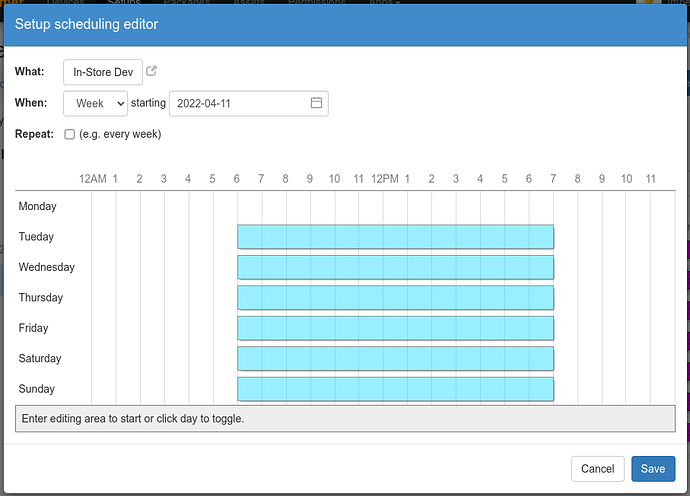
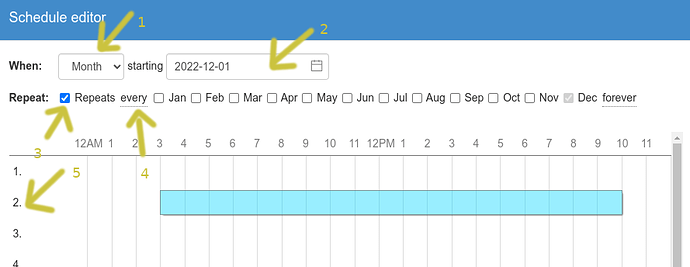
Each setup added to a schedule as its individual scheduling information. Here is how the dialog for editing this information looks like for one of the In-Store Dev setups used in the above example:
In the schedule editor you first specify the setup you want to schedule. In-Store Dev in this example. Next you specify the time frame and a starting date. In the example I’ve specified Week and April 11th. Finally you specify if the schedule should repeat. This allows you to create repeating schedules.
Finally in the calendar view below you specify the active time spans within the set time frame. In the example I’ve marked the setup as active in the week of April 11th on Tuesday to Sunday between 6am and 7pm. You can use the mouse to easily create new time spans or edit the existing ones.
Assigning to devices
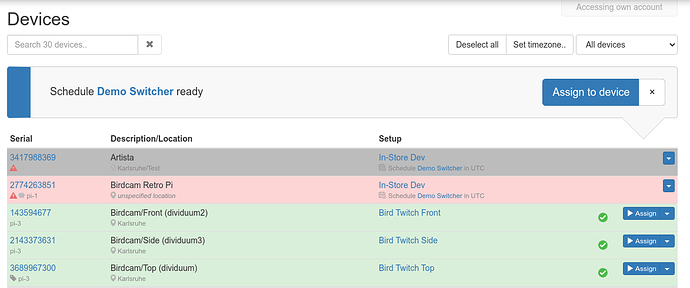
When you’re done creating a schedule, it’s time to apply it to one or many of your devices. Clicking on the Assign to device button does that. You’ll return to the device list page and can now click on the Assign button on individual devices or select one or many devices and click on the big Assign to devices button.
Once you assign a schedule to a device, it will almost immediately switch to the scheduled setup specified in the schedule. One final setting required for that is each device’s timezone. By default all devices start in the “UTC” timezone. If you select one or more device, a Set timezone.. button is shown above the device list. Clicking it allows you to change the timezone of the selected device.
You can add the same schedule to multiple device in different timezones and they will be scheduled according to their local time.
Beta test
If you’re interested in trying out this feature, please get in contact. Be aware that the scheduling might not work 100% reliable at the moment and you might still encounter issues when using the new feature. There might also be changes to the feature itself, potentially requiring you to reconfigure any schedule you create. So you might not want to use it on any important device. What I’m trying to say: This is a beta. Feedback is very welcome.
The future
Setup based scheduling is only part one of adding more native scheduling abilities to info-beamer. The next step will likely be adding a native schedule config element. This can then be used within a default setup configuration interface to schedule individual pieces of content. Both setup scheduling and the asset based scheduling should add plenty of options to schedule your content the way you intend to.


